
Configure email sending
Use QixCount sending or save and test your own mail-server connection.
- Who can do this
- Business owners with Manage business settings, roles & permissions
- Where
- Settings, then Email sending
On this page
Email sending controls how outgoing business messages are sent. You must be a business owner with the Manage business settings, roles & permissions permission.
Choose a sending method
- Open Settings.
- Select Email sending.
- Select Send through QixCount or Use your own mail server.
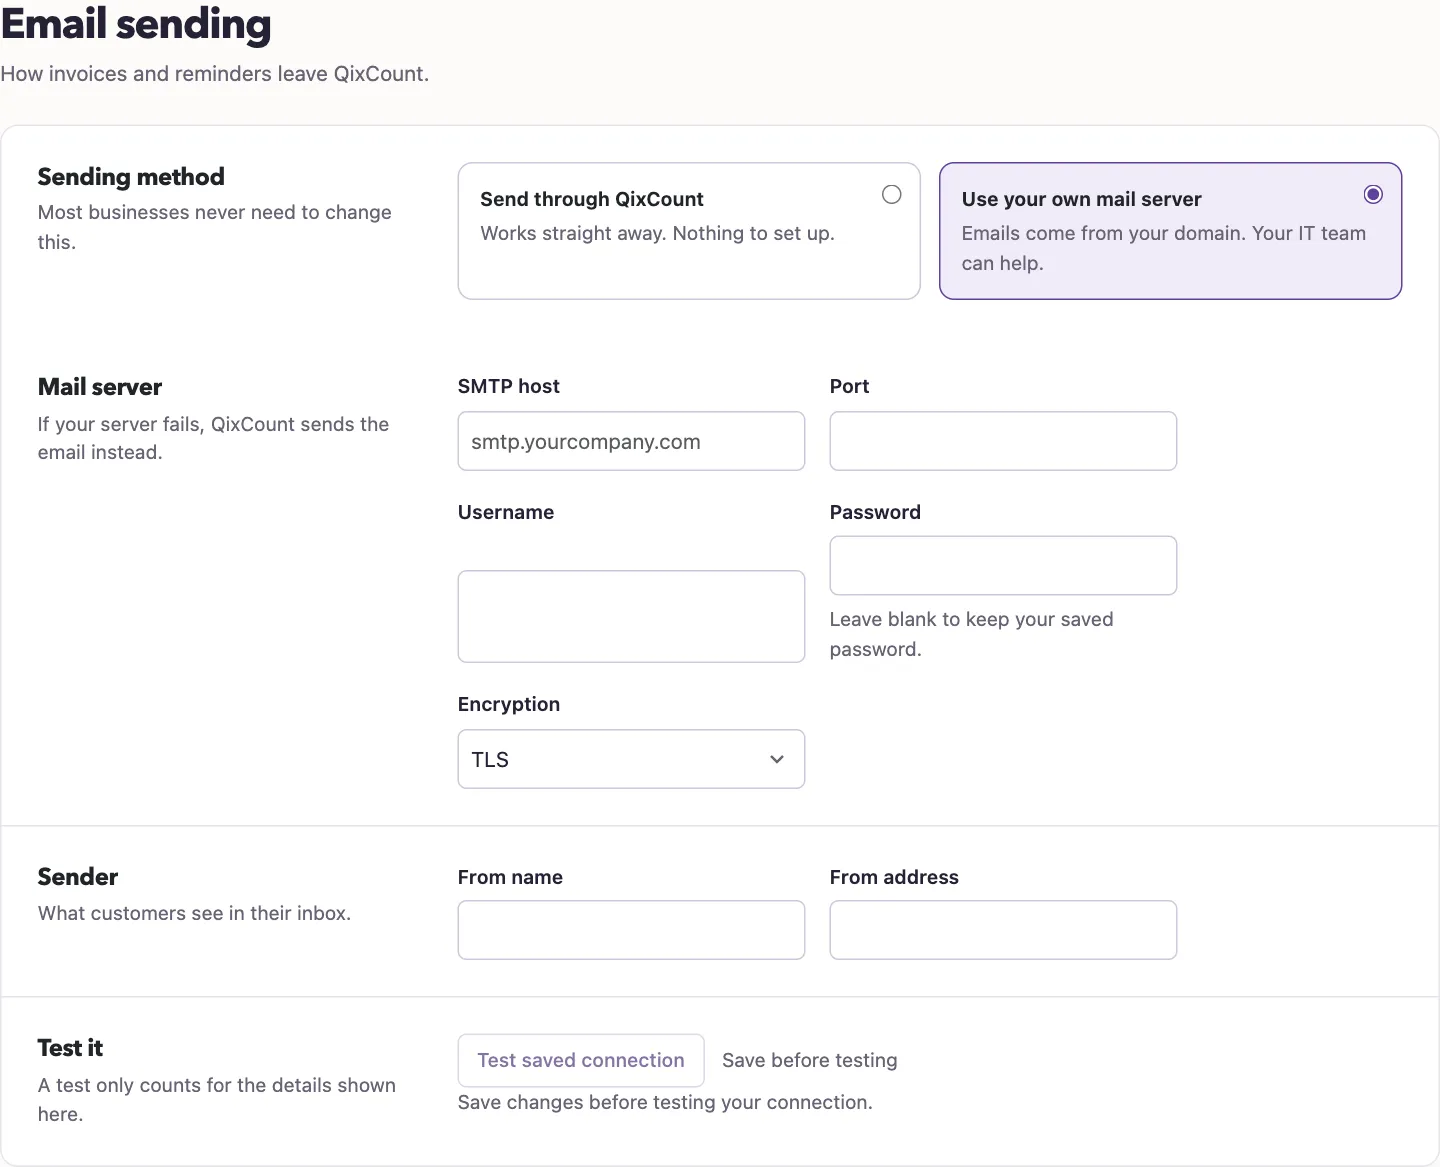
- If using your server, enter the connection and sender details.
- Select Save changes.
Your own server requires SMTP host and From address. The form also provides Port, Username, Password, Encryption and From name. Port accepts 1 through 65535. Use the details supplied by your mail administrator. Leaving the password blank keeps the saved password.
Test the saved connection
After saving your own-server settings, select Test saved connection. Unsaved edits disable the test. It connects using the saved host, port and credentials; it does not send a message or verify inbox delivery. Tests are limited to five per minute.
If the connection fails, check the saved host, port, username and password. A successful connection is only a connection check. To send sample content to your address, use the template test in Customize customer emails.
What happens next
QixCount uses your own mail configuration when both the host and sender address are present. If sending through that server fails, it attempts QixCount sending. Selecting Send through QixCount clears the saved host used to select your server; other saved connection fields may remain.
If the fallback also cannot send, contact support with the task and error message. Avoid repeatedly sending a live customer message while diagnosing it.
Good to know
Customer email wording is configured separately.