
Design your invoice documents
Choose a template, default wording, visible details and online payment settings.
- Who can do this
- Owners, or people with Manage business settings, roles & permissions
- Where
- Settings, then Invoices, quotes & receipts
On this page
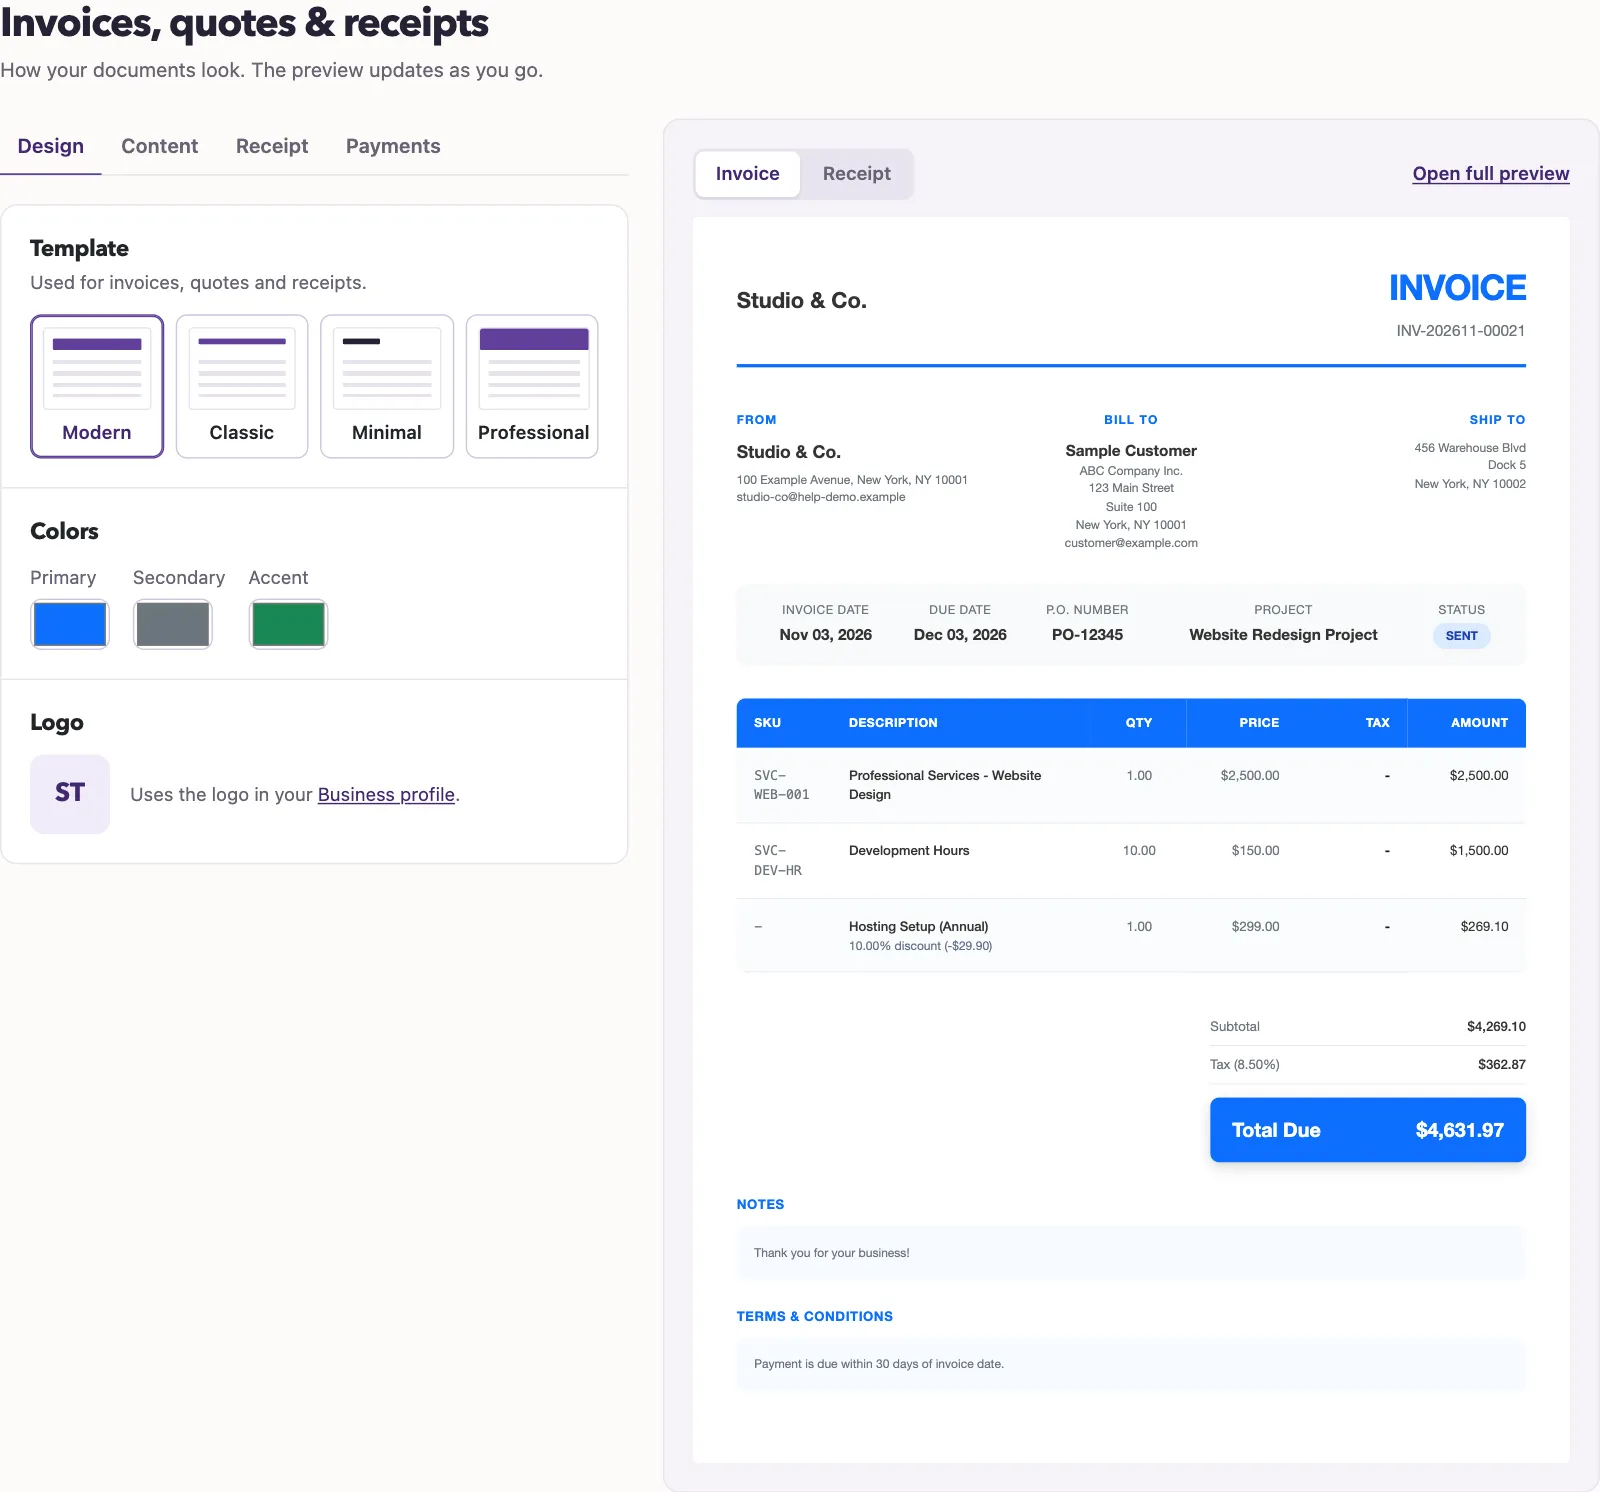
Use the document settings to change invoice appearance and default content. You need the Manage business settings, roles & permissions permission. The page is labeled Invoices, quotes & receipts; the preview displays a sample invoice.
Choose the design
- Open Settings.
- Select Invoices, quotes & receipts.
- Select Design.
- Choose Modern, Classic, Minimal or Professional under Template.
- Choose Primary, Secondary and Accent colors.
- Select Save changes.
The logo comes from your business or organization profile. You cannot upload it on this page.
Set the content
- Select Content.
- Enter Notes, Terms and conditions and Footer as needed.
- Review the switches under What shows.
- Enter Payment instructions if needed.
- Select Save changes.
Notes allow up to 1,000 characters, terms up to 2,000, footer up to 500 and payment instructions up to 1,000. Visibility switches include the logo, address, instructions, payment QR code and days until due.
The embedded preview updates as you edit. Open full preview opens the saved settings, so save first if you want that separate view to reflect your edits. A preview does not create or email an invoice.
Set receipt wording and details
- Select Receipt.
- Enter Title, up to 255 characters.
- Enter Note if needed, up to 1,000 characters.
- Enter Footer if needed, up to 500 characters.
- Review Reference number, Balance after payment, Tax ID and Payment notes under What shows.
- Select Save changes.
Receipt template, colors and logo come from Design. Payment notes are off by default because they can contain internal information. Select Receipt in the preview to see sample receipt data. Email wording and the PDF attachment switch are in Customer emails.
Set online payment options
On Payments, turn on Accept online payments, choose a Stripe connection, and select Save changes. The picker lists connected Stripe accounts created through the connection flow. If none are listed, use Integrations to connect Stripe first. You can also enter QR code link (optional), up to 500 characters.
These document options differ from the payment-method labels used when recording money received or paid. Continue to Configure payment methods or Customize customer emails.